How to Build a Feather Edge Fence
Never underestimate the importance of having good fencing around your home and garden. Not only does it improve the privacy, safety, and security of your property, but it also looks appealing, creating the perfect finishing touch for your outside space. If you are looking to make some garden improvements this spring, you may want to consider feather edge fencing. This attractive and durable type of wooden fencing is consistently popular with homeowners. Follow our helpful guide to building your own feather edge fence.
What is a Feather Edge Fence?
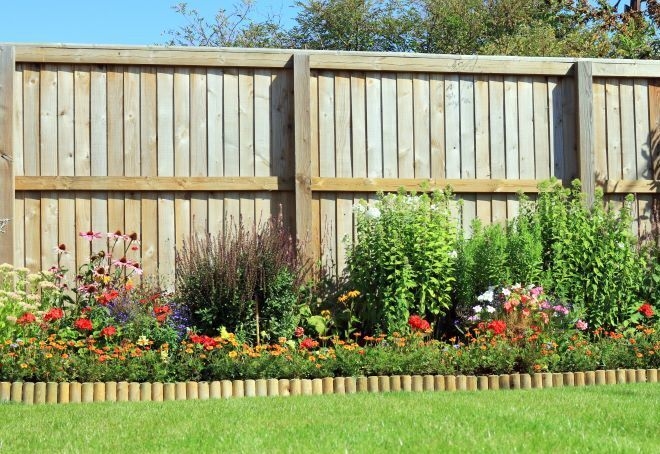
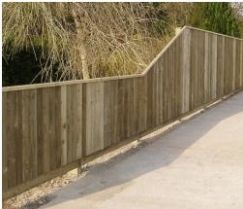
This type of fencing is an attractive alternative to standard fence panels. It is made from overlapping vertical timber panels that are fixed to horizontal rails, which are then secured to posts and concreted into the ground.
What are the Benefits of Feather Edge Fencing?
One of the biggest advantages of this type of fencing is that it can be customised to suit the contours of your own garden or outdoor space. It can be angled or shaped to fit around even the most awkwardly-shaped garden, giving a smart and attractive aesthetic. When made well and using high-quality materials, it can be stronger and more durable than a standard garden fence. It is also easy to maintain and treat and can be cut to allow for uneven ground. Furthermore, you can build your own feather edge fencing too, provided that you have some degree of DIY knowledge. Overall, this is a flexible style of fencing that creates a natural and ornate look and is appropriate for many different styles of gardens.
What do I Need to Install my Own Feather Edge Fencing?
You need to choose the type of feather edge board you want to use. You will also need a rail (the horizontal frame to which the vertical boards are attached), fence posts and post caps, PostMix for securing posts into the ground, gravel board to fit across the bottom of the fence and galvanised nails. You can also purchase feather edge panels, which can make the job easier and less time-consuming, although bear in mind you’ll lose the flexibility to alter the height for sloped ground.
Prior to installing your fencing, ensure that you have all the tools you may need to hand. You will need to establish where the fencing will go and measure the perimeter line carefully. At Mill Timber Direct, we have a handy online Feather Edge Fence Calculator, which allows you to quickly and easily identify the amount of material you will need to order. Simply select the height of fence you want, enter the perimeter you need to cover, and this handy tool will estimate the materials you need. You can adjust the quantities if you need to. Just ‘add to basket’ and away you go!
Installing Your New Fencing a Step-By-Step Guide
- Mark out a perimeter line where your fencing will go. You may wish to insert stakes into the ground and run string along them to mark it out effectively.
- Locate where posts will need to be and dig to a depth of around 600mm, placing some small stones in the bottom of each hole. Put the posts in place and use a spirit level to check they are straight. Fill the holes with PostMix, available at Mill Timber Direct, just up to ground level, and use struts (these can be timber battens) to hold them in place until the PostMix has set.
- Fit the rail. Some may need to be cut to size depending on the spacing of your posts. The rail should be flush to the outer edge of the first and last posts but in the centre of the next post.
- Attach your gravel board at the bottom of the fencing as the feather edge boards will sit on top of these. Screw the gravel boards into the posts.
- Next, attach your feather edge boards using galvanised nails. Overlap the boards by around 25mm to allow for the wood to expand and contract. Always attach each slat using three nails- one at the top, one in the middle, and one at the bottom.
- Add a fence cap or capping rail.
- Add fence post caps to give it the perfect finishing touch.
How to Look After Your New Fence
Our feather edge boards and fencing timber has been green or brown pressure treated for durability and weather resistance. However to further increase the life of your fence, we recommend staining it every couple of years with protective fence stain, or you may want to add colour to your fencing to better suit your garden style - take a look at our fence paints and stains.
Now all that is left to do is relax in your garden and enjoy all the benefits of your new feather edge fence!


Short Code:
Credit Limit:
Current Balance:


